Saturday, June 19, 2010

Preventing Redistributed Routing Loops


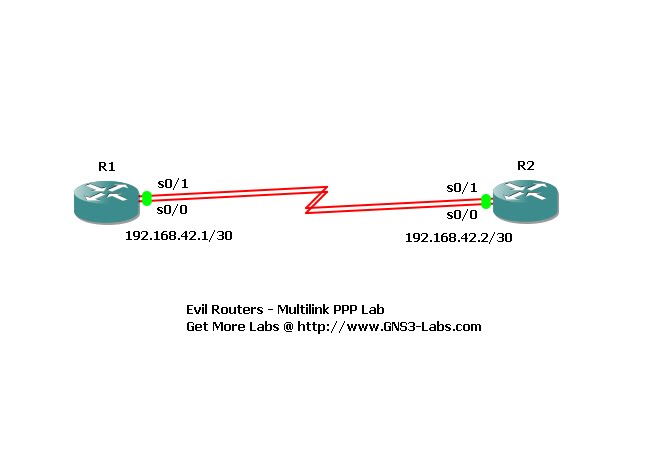
Today I ran over a quick lab of something you may experience in the real world, routing loops due to redistribution. As shown in the picture above, both the routers R1 and R2 are redistributing the same networks both ways. Because of Administrative Distance, each router would think the best route to EIGRP were through each others OSPF interfaces and vice versa which would cause a routing loop.

To circumvent this, I have created a route-map and assigned tags to both routing networks to prevent redistributed routes to be learned in both directions:

(Running Configurations on Both R1 and R2)
router eigrp 1
redistribute ospf 1 route-map OSPF-to-EIGRP
network 20.0.0.0
default-metric 100000 100 255 1 1500
no auto-summary
!
router ospf 1
log-adjacency-changes
redistribute eigrp 1 subnets route-map EIGRP-to-OSPF
network 10.0.0.0 0.255.255.255 area 0
default-metric 100
!
route-map EIGRP-to-OSPF deny 10
match tag 90
!
route-map EIGRP-to-OSPF permit 20
set tag 110
!
route-map OSPF-to-EIGRP deny 10
match tag 110
!
route-map OSPF-to-EIGRP permit 20
set tag 90

I'm going to be learning about GRE tunnels shortly as well, hopefully it isn't to complicated to grasp, VPN's and tunneling always confused me because I have a habit of over complicating things!

Sunday, June 6, 2010

Lab Portfolio Case Study 1


It took a while but I was able to finally finish the first case study presented in the CCNP Lab Portfolio book. I was rusty on a few topics but I was able to complete the following:

1. Enable EIGRP 1
2. Summarize the 5 loop back address on R2 (not presented in above image)
3. Inject a default route into the EIGRP network pointing towards R3
4. Configure OSPF between R3 and R4
5. Redistribute OSPF into the EIGRP network
6. Inject a default route into the OSPF network pointing towards R3
7. Configure DHCP on the R2 router in order for R3 to gain an IP address on its LAN (Fast Ethernet) interface.

All in all not to bad and it allowed me to brush up on the topics that I always forget! I'm digging pretty deep into my voice studies already. This morning I read through a lengthy overview on the history of Call Manager and VoIP in general. I'll probably finish that up by going through some white papers on IPCC along with the network warrior book.

Friday, June 4, 2010

IPv6 Challenge Lab


I finished today's lab which was a challenge lab, which basically makes you configure the network without any instructions besides IP configuration information. I was able to complete all required tasks successfully which included:

1.Enabling IPv6 EUI-64 between the R3 and R4 routers 2.Enabling EIGRP without auto summarization 3.Creating a manual IPv6 tunnel between the R1 and R3 router 4. Enabling OSPFv3 on all routers using IPv6 (R1,R3,R4)

While I'm about finished with the portfolio book, I'm about to dig even deeper into voice shortly, especially IPCC for my new job. I also picked up the network warrior book and reallly wished I would of had this a year ago, it gives some very good information how a live network operates and what happens in the real world instead of just topics you see on the CCNA.

Saturday, May 29, 2010

IPv6 6to4 Tunnels


Today I configured another type of IPv6 tunnels used to alleviate the headaches of switching to an entirely different IP format in a network! It's called a 6to4 tunnel and it does exactly what the name says. It encapsulates a Ipv6 address within a IPv4 packet so that it can use the IPv6 address locally and still travel across a IPv4 network. Do to the nature of this type of tunnel, it doesn't need to be configured on both ends of the tunnel since it's not considered a point-to-point link. To configure a 6to4 tunnel I used this simple command:

First I configured the logical tunnel:


R1 (config)# interface tunnel 0
R1 (config-if)# tunnel mode ipv6ip 6to4
R1 (config-if)# ipv6 address ipv6 address
R1 (config-if)# tunnel source interface
R1 (config-if)# exit

Second I configured a static route to point towards my tunnel:

R1 (config)# ipv6 route ipv6 address tunnel 0

This tells the router to send this particular IPv6 address out tunnel 0 and tunnel 0 routes this interface out of the source interface.

Monday, May 24, 2010

Using IPv6 Tunnels


Today's study session consisted of creating a Ipv6 Tunnel connection between two routers. OSPF IPv6 was also configured for the loopback interfaces on routers R1 and R3 to talk to each other. This lab was fairly straightforeward and allowed for me to play around with tunnel interfaces a little bit. I come across tunnel interfaces quite a bit in my current job role so it was good getting some practice in with configuring them even if they were IPv6 tunnels which aren't to common yet in most networks! My next IPv6 lab will be on configuring 6 to 4 tunnels which is a tunnel that allows you to encapsulate IPv6 address into a IPv4 packet to traverse over a network. This is particularly useful in networks that haven't migrated to IPv6 completely yet (which is most networks).

Sunday, May 23, 2010

Configuring OSPF for IPv6


I'm finally on the last chapter in the CCNP Portfolio book which covers IPv6 topics. Today's lab was dealt with configuring the many types of IPv6 address (link-local, EUI-64, etc). The lab ended with configuring OSPF over IPv6 along with a challenge lab. The challenge lab consisted of summarizing two IPv6 addresses over OSPF. All in all it was very straight foreword, when it comes to configuring IPv6 I noticed that it's very similar to it's older brother IPv4 except the order you place commands and the way you implement them on your router device. I was very surprised honestly that it worked over the switch as well, I figured the GNS3 switch wouldn't understand how to interpret the IPv6 address in its MAC table but I was wrong thankfully.

Saturday, May 22, 2010

Multilinks Revisted


So I wasn't able to work through one of my CCNP Portfolio labs this morning so I subsituted with something I deal with commonly..multilinks. I've posted on this topic before and it's really straight forward to configure. Basically your load-balancing data across all of your T1 links in a simple but effective manner. You do this through the use of the PPP protocol and a logical interface called a Multilink (go figure). Say you have a business that wants to use 3 Mb of data rather than the standard 1.5 Mb, you can take their 2 serial interfaces and bundle them into one with two simple commands:

ppp multilink
ppp multilink group


You also have to create the multilink interface and assign the multilink the designate IP address as shown above. Thanks to GNS3-labs and Evil Routers for today's lab.